Monday, December 31, 2012

Grandmothers Italian Chicken Soup - easy chicken soup recipe


Grandma's Chicken Soup

My grandma made this easy chicken soup recipe.   She called it Italian Chicken Soup, which was good enough for me, as a kid.    It was quite simple…    Chicken meat, chicken broth, possibly some chopped carrots and some orzo pasta, or rice…


When serving it, we would sprinkle a spoonful of grated Parmesan cheese on top.  It would melt, stick to your spoon, but it would taste so great!!!


Usually, she would use some leftover chicken meat for the soup. At times, she might resort to using a can of swanson canned chicken, if she didn’t have leftover chicken and really wanted some soup.   As she was getting on in years, her eyesight started to go.   One day, when I was sick, she mistakenly used a can of tuna, instead of chicken.   She wanted to give me something hot, to deal with the flu I was suffering with.   


Now, being sick, I knew my tastes buds were off, but, I knew something was wrong.   Especially since I can’t stand tuna fish!   So, I said, hey Grandma! Something is wrong with this soup!   She said let me look at the can… Oh, it’s tuna instead of chicken!   Eat it anyway!   Oh my goodness, it was so nasty…  So, the moral of the story:  Don’t mistake tuna for chicken….


Needless to say, other than that one time, her chicken soup was something I truly looked forward to.   These days, I make my own version, based on her soup.


Here is what I do:


I go to the market and buy two or three rotisserie chickens.   The family will eat one for dinner.   I will remove the meat from the remaining chickens and put it in the refrigerator.   All of the bones and skin, I put in a big pot and fill it with water.


I then boil it for a few hours to make a broth.   After boiling, I pour out the liquid and strain it into a few containers and let cool.  Then, I refrigerate the broth over night.


The next day, the fat will rise to the top of the broth and solidify.   I remove the fat.  Now, I have a gallon or more of homemade chicken broth. 


That is how I make my broth.   Really simple, but takes some time.    You can choose to buy already made broth, if you want, and sometimes I do.  But, if you have the time, you can’t beat this broth.


When I want to make the soup, I chop up some carrots and put them in the pot with the broth.    I also cut up some of that left over rotisserie chicken and put it in the pot as well.


Next, I add some spices.  Thyme is excellent.  I always add some minced garlic. Sometimes, I add chopped leeks.


Simmer it for about a half hour or more, depending on how soft you want your carrots.    Add the orzo, and simmer for another 15 minutes…


Salt to taste!  This is the beauty of making the broth yourself.  You can tailor the salt to your liking.


Ladle out into a bowl and sprinkle with some grated parmesan cheese.


Enjoy!


I hope you enjoyed making my version of Grandma’s chicken soup.   It brings back memories for me every time I eat it.    If you wish to can the soup, don’t put in the orzo pasta.  Pressure can it without any pasta.   You can add the pasta when you are heating it up, to eat.    

This is an Authentic Italian Recipe that I hope you will try!

Manicotti - Oh Man!!!!!!

Manicotti is one of those things that is just so amazing.   These taste so great, truly a gourmet meal, fit for a king.   Ever since I was a small boy, I loved these even better than stuffed shells or ravioli.  One of my all time favorites.


Manicotti looking quite delicious
Manicotti is delicious!
Here, pictured with some garlic knots made from some pizza dough


The thing that makes these manicotti amazing is the pasta crepes that you make yourself!  Don’t worry, it is easy.   Don’t be intimidated and get the manicotti shells pasta in the box.  These are in a completely different league.   If you can make a pancake, you can make these. 
You can also wrap the crepes in plastic wrap and freeze them, or store in the refrigerator for a few days.

Ingredients
Crepes:
·         1 cup flour
·         1 cup water
·         3 large eggs
·         ½ tsp salt
·         Olive Oil for use in the pan while cooking
Filling:
·         2 pounds part skim ricotta
·         6 oz shredded mozzarella
·         ½ cup grated parmesan cheese
·         1 large egg
·         2 tbsp parsley
·         ¼ tsp salt
You will also need sauce and some extra mozzarella for melting on top.
Directions

First, you will want to make the crepe mixture:  
Simply whisk together all of the ingredients for the crepes in a bowl until smooth and well mixed.   Cover and place in your refrigerator for about a half hour.
While the crepe mixture is chilling, make the filling:
Beat the egg in a large bowl.
Add the other ingredients slowly while stirring.
Now, make the crapes
Heat a small skillet and lightly coat with oil.  Use medium heat.  
Pour about a 1/3 cup of the crepe mix into the pan and rotate the pan, so that the mixture covers the entire bottom of the pan. 
After cooking for about a minute, the edges will start to turn brown and start to lift.  That is your signal to flip the crepe over and cook for about another half minute.
Remove the crepe from the pan and place on waxed paper.   Continue with the remaining batter to make all of your crepes in the same way.
And the grand finale
At this point, we have our filling and crepes.   Now, we need to assemble the Manicotti.
Ladle some sauce in the bottom of a casserole dish, or 13 x 9 pyrex baking dish.
Spoon about a ¼ cup of the filling onto a crepe.  Roll the crepe and place in the casserole dish seam side down.    Repeat for all of the manicotti.
When all of the manicotti are rolled and in the pan, ladle some sauce on top.   I usually sprinkle a little mozzarella and parmesan on top at this point.
Cover with foil.  Make a tent, so that the cheese doesn’t stick to the foil.
Bake for about 45 minutes.
Serve piping hot!   Enjoy with some garlic bread, a nice salad and a glass of Chianti!

Friday, December 28, 2012

Organic Foods and my Opinion


A word on organic food and my blog

I just want to state that what I am saying here, is just my opinion…   Some believe as I do, others do not.

Whenever you are cooking or making wine, it seems like common sense to me that the quality of the ingredients going into whatever you are making have a profound effect on the quality of the end product.   That doesn’t mean that if you have all great ingredients, you are guaranteed to have an excellent outcome.   I have messed up several times with excellent ingredients, that is for sure. However, your chances of things coming out the best they can be, and tastiest and healthiest I might add, are greatly improved.

Conversely, the opposite is almost always true.  If you put poor quality ingredients together, you will almost always come out with a poor quality outcome.   If you don’t like the way a wine tastes when you drink it, don’t ever cook with it!  It is not going to taste better in your food.

With that said, I strive to get organic foods whenever I can.   I drink organic milk in my coffee.   I use organic butter.   You can really taste the difference!  

Do I get everything organic? The answer is no.   In an ideal world I would, but there are some things that are more important to me to get organic, than others….

Top of my buy organic list is:  Dairy, Eggs, Lettuces, Spinach and other leafy greens,  soft skinned fruits, such as grapes, peaches, pears, apples, berries, etc.  Bananas are another fruit I get organic.

Things like melons, pineapples, lemons, limes, oranges and other citrus… Where you don’t eat the skin, I usually get the conventional versions.   Of course, the organic versions are better, but not always so easily available or affordable.

In may parts of the country, there are small organic farms that offer CSA programs.   CSA stands for Community Supported Agriculture.    You pay a price for the year, and pick up a  box of fruits and veggies every week, in most cases.   Search for CSA or Community Supported Agriculture in your area on the web.  You will be surprised.   Some even bundle in an option for organic eggs and dairy.    If you have the option to get dairy, where the milk is raw and not pasteurized, I would opt for that choice, personally.

So, in my recipes, certainly assume that much of what I am using is organic.   Some of which I grow myself!   I grow my own grapes, strawberries, raspberries, blueberries, blackberries and figs.   I also grow many veggies….  There are so many options available to you if you want to grow your own food.     

Oh, and garlic!   Garlic is so easy to grow!   Take each clove of garlic and plant them 4 inches apart, point side up.   The key is do that in November!   Come next July, each of the cloves will be a whole individual bulb of garlic!  Cut off the single flower in mid spring. Pull them out mid to late July, and dry them out.  They will store for the whole winter!    This is so easy!   Why do we get garlic imported from China, in the USA?  I don't understand!  This is so easy to grow, and if you use organic methods, you will have great garlic for your recipes.

As for making your own wine from kits, realize that almost all kits are not organic.   You can get frozen grape pails that are, but your choice is limited.   But, most of the wines I make have about 1/8 the sulphites that commercial wines have.   Most people absolutely love my wines….   I know I do…

So, keep on checking back.   I will be sharing some growing tips along with my cooking and wine making….

I wish you all a happy and safe new year.

Stuffed Italian Rice Balls - Arancini di Riso - with Marinara Sauce


Italian stuffed rice balls are one of my favorite things.  Then again, most Italian food is!  These rice balls are excellent to have, when you are looking for a hardy lunch.   I absolutely love these with some piping hot marinara sauce poured over them.    Some people like these as an appetizer to a dinner, some like them for lunch, with a nice bowl of soup next to them…   Regardless, these are sure to be a nice change of pace.


This Italian dish is also known as Arancini di Riso, which means "little orange of rice".

Arancini di Riso - Italian Rice Balls


Ingredients

Rice:

3 cups of long grain white rice
6 cups of water
2 Tablespoons Olive Oil

Filling:

1 small onion, chopped
3 cloves chopped garlic
1 lbs ground beef or turkey
3 cups of Marinara Sauce
1 ½ cups frozen baby peas
1 cup Parmesan cheese
½ cup Romano cheese
1 lbs shredded Mozzarella cheese
2 eggs, beaten
Italian Seasoned Bread Crumbs for coating
Olive Oil for frying.

Directions


First, make the filling:

  • Sautee the onion and garlic in a large skillet.  Don’t burn the garlic.
  • Remove the onion and garlic from the skillet, and set aside.
  • Brown the chopped meat in the same skillet.   Drain off any fat.
  • Add the onion and garlic to the meat in the skillet.
  • Add the marinara sauce and simmer for about 20 to 25 minutes
  • Add the frozen peas and cook for another 10 minutes.
  • Uncover the meat mixture and cook off some of the moisture.   The meat/sauce mixture needs to be thick.
  • Remove from heat to cool

After making the filling, make the rice:

  • Heat up the olive oil in a pot until it is hot.   Add the rice and stir until it is evenly coated.  Heat it for about a minute, but don’t brown it .
  • Add the water.   Be careful when adding the water, as it will sizzle. 
  • Bring the water to a boil, then cover and cook for 20 minutes on low heat.   Do not take the lid off while the rice is cooking.

  • When the rice is finished cooking, place the rice into a bowl.
  • Add the parmesan and romano cheese to the rice, while it is hot, and mix into the rice.
  • Let the rice cool.

Now, to make the rice balls:

  • Add the beaten eggs to the rice, after it has cooled off a bit.  Gently and evenly mix the rice, grated cheese and egg mixture.
  • Form the rice into a ball using your hands. 
  • Take your finger and poke an indentation into the ball. 
  • Fill the indentation with some mozzarella cheese and tablespoon full of the meat mixture.
  • Close the indentation, using rice to seal in the filling and reform the rice ball.   The meat/sauce mixture should be completely sealed.
  • Roll the rice balls in the bread crumbs.
  • Fry the rice balls in olive oil, using a large skillet.  Fry them until golden brown, carefully turning to evenly heat.

Plate up the rice balls, by sprinkling them with some grated parmesan.   Serve with some heated marinara sauce.


I hope you have enjoyed this Italian Rice Ball recipe.    Please stay tuned and check back frequently, as I will be posting more of my family favorites….

Monday, December 24, 2012

Italian Biscotti - Excellent with a nice cup of coffee!

Biscotti is a traditional Italian cookie or biscuit.    There are several types of biscotti, most of which are hard and crunchy.   This is due to baking the biscotti twice.   The great thing about making biscotti yourself is that you can adjust the crunchiness with how long you choose to cook them.  This is great for folks who love this Italian desert, but have issues with the cookie’s hardness due to their teeth.

Almond Biscotti, Dipped in Chocolate!
This Almond Biscotti is dipped in chocolate

Although almonds, pistachios, and peanuts are commonly found in biscotti, I tend to say away from using peanuts, due to the fact that so many folks are allergic to them.   I prefer almonds anyway!
Biscotti is an excellent Italian dessert that I love to dip in my coffee.  Many enjoy it with cappuccino or a dessert wine.
Enjoy this Italian Recipe!
Ingredients:
·         1 cup (2 sticks) butter, softened
·         4 eggs
·         4 1/2 cups white flour
·         1 Tbsp. baking powder
·         1 tsp. salt
·         1 to 1 1/2 cups of almond slices
·         1 Tbsp.  Lemon zest
·         2 tsp. vanilla extract
·         2 tsp. almond extract
·         2 tsp. anise extract
·         2 oz. of Italian brandy
Directions:
Prepare baking pans with either parchment paper.  Preheat the oven to 350 degrees.
In a separate bowl, mix the flour, baking powder and salt and gently stir, until evenly mixed.  Put this bowl aside.
Cream the butter by first softening it and then processing it in your mixer.
 Next, add the sugar, lemon zest, extracts, brandy and eggs and mix thoroughly.
Add the flour mixture slowly into the mixer and mix with the egg mixture and continue mixing until all of the flour mixture is incorporated. 
Add the almonds during the end stages of the mixing.   Mixing will break some of the almond slices, so you may want to save some for the end to incorporate by hand after mixing, if bigger pieces are desired.
Spread dough on baking pans in two "logs" (3 inches wide by 3/4 inch tall).
Bake at 350 degrees F. high in the oven for about 25-30 minutes until they are golden brown.
Remove the Biscotti logs from the oven and let cool about 20 minutes.
Slice the biscotti logs on an angle, making slices about ½ or ¾ inches.  Place each cookie on its side.
Bake the biscotti an additional 8 to 10 minutes.
Take the biscotti out again and flip each cookie over to the other side and bake again for 8 to 10 minutes.
Remove the biscotti and let them cool completely.
These biscotti are excellent on their own.    If you want to kick it up a notch, you can melt some chocolate.  I like to use Rapunzel Organic fair trade dark chocolate bars and I melt them in either a double boiler or use a little crock pot.   My big crock pot came with a small one as a bonus.   Although I buy these at my local supermarket, they are also available from Amazon, so I am going to be adding them to my Amazon store!   Is there anything that Amazon doesn’t sell?


Rapunzel Chocolate, one of the finest chocolates.
This is an excellent chocolate!


You can either dip the end of the biscotti in the chocolate or coat the top of the biscotti. Place on a baking sheet or dish and put in the refrigerator to cool.  Lining the baking sheet or plate with either parchment paper or plastic wrap may make handling easier.   The plastic wrap works better for me.
Another variation is: after the chocolate is on the biscotti, sprinkle some crushed almonds on the chocolate immediately after coating the biscotti.
I hope you have enjoyed this Italian recipe!   Biscotti is an excellent addition to your Italian family cooking recipe book.

Monday, December 3, 2012

Chicken Francese Easy Yummy

You, too can make this amazing Italian Recipe!

Easy and Delicious Chicken Francese
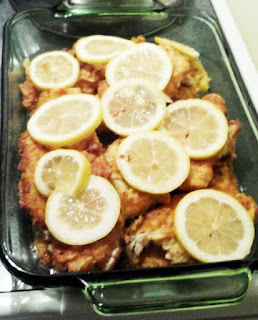
Chicken Francese prior to being bathed in Lemon Juice and placed in the oven.
Ahh….  Chicken Francese…. The first time I had Chicken Francese was at Ray’s Famous Pizza, in New York City.   My family didn’t make this as I was growing up.    When I tried it, I wondered where it was my whole life!   And that very day I vowed that I would master what would become one of my all time favorite Italian dishes.
And I have to say, the Chicken Francese recipe that  I am going to show you how to make is even better than the one I had at Rays!  It is so easy to make, you will be astonished.


Here is the best part and a hint: I usually double or triple this recipe!    The amazing thing about this recipe is that the leftovers taste even better than when it was first cooked!    This is because it is sitting in the lemon juice when you store the leftovers in your refrigerator.    I usually make a few days of meals with it.   We always say when we make this, “Aren’t leftovers glorious?”  
So, I will say this to you, my friend:  If you don’t try any other Italian Recipe on my website, or if you have to choose only one to be stranded on a desert island with, this is the one.   What I am giving you here is Italian Gold!
Ingredients
·         2  lbs Thin Sliced Chicken Breast Cutlets
·        5 Eggs
·         1/2 cup Parmesan cheese
·         1 cup Flour
·         6 Lemons
·         1-2 tbl Parsley
·         ½ tsp Salt
·         Olive Oil for frying.
Directions
1.   Juice 4 of the lemons, reserve the juice.
2.   Slice the two remaining lemons into thin circles.   Place lemons aside
3.   Beat the eggs in a bowl.   Add the Parmesan cheese, parsley, salt and two tablespoons of the flour.  Beat well, into a batter.
4.   Place the remaining flour in a shallow plate.   Heat a the olive oil in a pan on Medium Heat.

5.   When Oil is heated, dip each chicken cutlet in flour and shake off the excess.   Dip the floured chicken cutlet in the egg batter, then fry in the olive oil.

Frying the Chicken Frances in Olive Oil
Using the Spatula to free the chicken cutlet from the bottom of the pan.  Notice the tongs in the upper right of the picture.   These two tools are essential to your safety and success.

6.   Fry one side of the chicken cutlet, using a flat spatula, carefully loosen the bottom of the cutlet from the pan.   Then , use a pair of tongs to flip the chicken.   If you don’t use the spatula first you may detach some of the egg coating.   If you try to flip the chicken over with the spatula, and don’t use the tongs, you risk burning yourself with hot oil splashing out of the pan.  (Don’t ask me how I know this….)
7.   When completely fried, put in an oblong baking dish, or casserole pan.   Place sliced lemons on top.
8.   Evenly pour the lemon juice on the fried chicken.   If you feel you need more juice, by all means, juice a few more lemons and pour it on top.
9.   Cover the chicken with foil a bake in the oven at 350 degrees.  You only need to do this to keep the chicken warm as you make the other sides and to infuse the chicken with steaming lemon juice.   You will, therefore only bake for about half hour or so…
10.                Make you sides.   We like pasta or rice.   Some steamed or sauté broccoli is also excellent on the side.
11.                When serving, you may want to garnish with some additional lemon.
Enjoy the fabulous Italian dish with a nice glass of wine.  For a white, I would drink Riesling.   For a red, I would choose Chianti.    Also, have some lemon in a glass of water.
I hope you have making one of my favorite Italian recipes.   You can’t fail!   You will be amazed how great this dinner is, and I bet your family and friends will not be able to believe you made this….


Friday, November 30, 2012

Chicken Cacciatore AKA Hunter’s Chicken - easy chicken recipe


Chicken Cacciatore AKA Hunter’s Chicken


An Italian family favorite, chicken cacciatore consists of braised chicken in a tomato sauce , mushrooms, peppers and herbs.  It is also known as “hunter’s chicken”, because the word cacciatore means “hunter” in Italian.
This is my take on this famous Italian easy chicken recipe.  I remove the skin and bones, after the chicken is cooked, since I don’t like fussing with the bones.   At times, I have even substituted boneless Chicken thighs and breasts, although cooking the chicken with the bones and skin adds some flavor to the dish.  I recommend making Chicken Cacciatore in a slow cooker or crock pot.  Using the slow cooker, the chicken becomes so tender, it falls off the bone.   Although it takes a long time to cook, it is very much worth the wait.  
Ingredients

·         2 Chickens, quartered. ( Some people prefer all chicken thighs if you do, get 2 to 3 lbs )
·         ¼ cup extra-virgin olive oil
·         1 package sliced white mushrooms
·         1 large Vidalia onion, chopped
·         2 red bell peppers, diced
·         3 garlic cloves, minced
·         3 cups Tomato Sauce
·         2 teaspoons dried oregano
·         ½ teaspoon red pepper flakes (optional)
·         2 medium zucchini, cut into ½-inch slices
·         ¼ cup chopped fresh basil
·         1 cup dry Italian Red Wine
·         Salt
 Directions
1.       Brown the chicken in a fry pan with some of the Olive Oil using medium – high heat.   You don’t have to cook it all the way through, but brown it.
2.       Transfer the Chicken to your crock pot.  Put your crock pot on the high setting.
3.       In the same frying pan, sauté the mushrooms, onion, red pepper, and garlic in olive oil. The mushrooms will start to reduce in size a little.  Sauté until veggies begin to soften.   Transfer to crock pot to join the chicken.
4.       Add the wine, tomato sauce, oregano, and red pepper flakes (optional) to the crock pot.
5.       Cook in the crock pot for about 2 hours.  
6.       Add the zucchini.
7.        Continue for about another hour.
8.       By now, the chicken should be tender and pulling away from the bone.
9.       Remove the chicken from the crock pot.   De-bone and skin the chicken and return only the meat to the Crock Pot.
10.   Stir in the basil and cook for 10 minutes.
11.   Season with Salt to taste
12.   Serve over Pasta, Rice or Polenta

That's it!    Chicken Cacciatore is an amazing Italian dinner.   Loved by everyone, this authentic Italian recipe is one that is sure to be a hit with your family.  

Even though it takes a while to make, left overs reheat well, so you can enjoy this Italian dish for a few meals.   

As for a wine pairing, I am partial to Italian Red Wines...  Many like to white wine with chicken, but I still do reds.   So, I am recommending a glass of Chianti.  Many would say Pinot Grigio.   Choose your favorite.

Enjoy my take on this classic Italian recipe.

Italian Bread

There is nothing quite like freshly baked bread.  Hot from the oven, buttered or dipped in some olive oil, Italian bread that you baked yourself from this recipe will be sure to please.

It has been a long time Italian secret:   If you want to sell your house, bake bread.  The smell of the Italian bread baking, with its amazing aroma permeating your house.  It can attract home buyers, by creating an warm and cozy atmosphere.  It will make your house more attractive, by appealing to your buyer's powerful sense of smell.  You can sell your house in record time, thanks to the gift if Italian Bread!!!!!

The thing to remember when baking breads, is that bread takes time.   You can't rush the process and get exceptional results.   So, plan in that it will take a few hours.   Don't rush it.   In fact, the longer  it takes, the better your Italian bread will come out.    Get your children involved making it with you.   Enjoy the quality time and conversations you will have with them, making  bread together.  The memories you will create will be well worth it.


Homemade Italian Bread is very delicious.
Homemade Italian Bread


Italian Bread

·         1 pkg active dry yeast
·         1 1/2 cup warm water
·         ½  tablespoon salt
·         4 cups all−purpose flour
·         yellow cornmeal
·         1 slightly−beaten egg white
·         Olive Oil


Directions

I make this using either a Kitchen Aid mixer OR a Bread Machine ran on a dough cycle.   You can, if you desire, choose to hand knead.

·         Dissolve the active dry yeast in warm water.
·         Stir in 1 C. of the flour, beat well.   Let this sit for about 15 minutes.
·         Add remaining flour and salt
·         Either:
1.   Start your bread machine on its dough cycle
2.   Run in Kitchen Aid with dough hook for about 20 minutes to ½ hour.
3.   Knead by hand for about a half hour


Dough in a Kitchen Aid Mixer with a Dough Hook


·         Coat the dough ball with Olive Oil and place in a bowl. Cover the bowl with a wet towel and let rise in warm place until it doubles (about 1 1/2 hours) in size.
·         Punch down the dough ball and let rise again until double (about 1 hour).
·         When you are ready to make the loaves, do so on lightly floured surface.   Place the dough ball on the floured surface and cover and let rest for about 10 minutes.
·         Sprinkle a baking sheet with some corn meal.
·         Shape the loaf of bread and place on baking sheets on top of the corn meal.   *See section on how to form a loaf of Italian Bread at bottom of page.
·         Cover with damp cloth, but don't let it touch the dough.  You can make a tent using a few tall glasses.
·         Add 1 T. water to egg white and gently brush over top and sides of loaves.
·         Slice the top of the dough  diagonally with a sharp serrated knife, about 2 ½ inches apart.
·         Optionally, you can sprinkle the loaf with toasted sesame seeds, or seeds of your liking.
·         Let rise in warm place until double (1 to 1 1/2 hours).
·         Position your oven racks so that you have two racks in the lower part of your oven.   You will bake the loaf of bread on the top one, but place a pan of water on the lower one.   The steam from the bottom pan of water will help create a crisp crust.
·         Pre-heat your oven to 400 degrees F.
·         Place your pan of water on the lower oven rack.
·         Bake for about 40 minutes or until browned and done.
·         Cool.


How to form a loaf of Italian Bread

·         For a large loaf of Italian Bread, roll dough in 12 x 16 inch rectangle, about ¼ inch thick.
·         Beginning at long side, roll the dough up tightly, like a Jelly Roll, sealing well as you roll.  Pinch and taper the ends.   Place each loaf of Italian bread seam side down on cornmeal sprinkled baking sheet. With sharp knife, make diagonal cuts 2 ½ inches apart, about ¼ inch deep.

You can also make smaller rolls for subs!

I sure hope you have enjoyed this excellent Italian recipe.  Once you get the hang of making this Italian bread, you can expand on it.   Come back to this site for more bread recipes.   In the near future, I plan on posting some variations, like Italian Sausage bread.  Yum!

Enjoy!