Tuesday, December 17, 2013

Christmas Food Ideas - Traditional Italian Christmas Dinner

Hello Everyone,

First off, I want that thank all of my readers for stopping by and want to wish you and your families a very happy holiday season!  For all Italians, especially Sicilians, Christmas is family time, where we get together and share good food, wine and family togetherness. Food, of course, brings us together, and I wanted to share some Christmas Food Ideas with you, for your Traditional Italian Christmas Dinner.  

What says Christmas like a family gathering with all you your most loved people, with excellent Christmas Food and Wine!   Of course, like most Italian family gatherings, it will be loud, there will be some arguing, yelling, mis-understandings, and the televisions will be blaring in every single room, but hey, that is what Italian's do during the holidays!  Thank God for Wine!


Strufoli - A Festive Christmas Food Idea


Italian Rice Balls Strufoli - Traditional Christmas Food Idea
Italian Rice Balls Strufoli - Traditional Christmas Food Idea


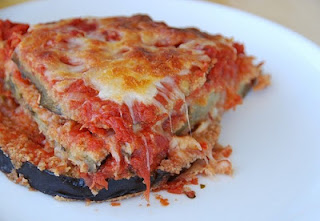
Eggplant Parm is a great Vegetarian Christmas Food Idea
Eggplant Parm is a great Vegetarian Christmas Food Idea 


So, let's start off with the bread.    This is something you want to start at least two days before, and it is easy if you use the No Knead Method.    So, here is my No Knead Bread recipe, as the first of my Christmas Food Ideas.  This is really easy to make, so definitely give it a try.    The great thing is that you can make the dough a head of time, and make it fresh for your Christmas Dinner!  Another kind of Italian bread is the Ciabatta. There is no better Christmas Food Idea than fresh baked bread!   Brush some of it with egg whites and sprinkle with sesame seeds before baking!

The next of my Christmas Food Ideas is a Traditional Italian Appetizer, called an Antipasto Platter. My article of how to make an Antipasto Platter will show you how you can easily make your own and impress your family and friends.  A nice glass of wine is an excellent accompaniment to this delicious appetizer. 

The soups I am suggesting for my Christmas Food Ideas are Pasta Fagioli and Grandma's Chicken Soup.  We love soup during the winter months....

Italians usually have multiple things for dinners at family gatherings, Christmas and Easter are usually two of the biggest.  So, I will suggest a few Christmas Food Ideas for dinner options.   Usually several are made.

Turkey Meatballs
Chicken Cacciatore
Chicken Cutlet Parmesan
Turkey Lasagna
Eggplant Parmesan
Chicken Marsala
Manicotti


For my side dish Christmas Food Ideas are:

Rice Balls
Shrimp Scampi
Stuffed Mushrooms

Don't forget a nice Romaine Salad, with lettuce and tomatoes. The Red and Green of this salad make it a perfect Christmas Food Idea.   Choose your favorite vinaigrette as a dressing.

And for Dessert if you can fit it!

Tiramisu
Italian Sesame Cookies
Strufolli

I hope these Christmas Food Ideas are helpful for you and your family to have a festive Holiday meal with your loved ones.  From my family to your's, I am wishing you the most happy and healthy family season.


Friday, November 15, 2013

Homemade Chicken Soup without the MSG - Works for Turkey Soup Too!


It is very easy to make Home Made Chicken Soup.

The past few years, we have been very into making soups.   Often times, you will find rotisserie chickens stores for very inexpensive.    BJs, Costco and others have these Chickens for $4.99 US.  You couldn't buy a chicken and make it yourself for that price.   So, I usually buy a couple of chickens already cooked and...

  • Have a Chicken Meal
  • Have left over Chicken for other meals
  • And make Homemade Chicken Soup...
It is easy to do, and I will show you how!   My video on how to make chicken soup is here:


Ingredients
  • Soup Greens from the Store,  cut up like I have it in the video
    • Usually comes with Carrots, Celery, Onion, Parsnip, Turnip, Leek, Dill, Parsley, Thyme.
  • Two Cooked Rotisserie Chickens from the store
  • Minced Garlic
  • Water
  • Salt to taste
Directions

Debone the Chickens.  Put all of the bones and any skin you don't want into a pot.

Cover the bones in the pot with water, cover the pot with a lid and simmer for about two hours.

Chop up the veggies and herbs, and set them aside.

Cube some of the chicken for the soup.   Make the pieces the size you would like your soup.  You can see how I cut up mine my video, as well as how the veggies are cut up.

After the chicken soup has been simmering for a few hours, I transferred the chicken broth out by pouring into another container and straining out the bones and other parts with a colander .

Next, I let the broth sit a little while and let the fat rise to the top.   Using a ladle, I remove the fat.  You can see this in the video, too.    If I am making turkey soup, I let this sit over night in the refrigerator (after cooling of course) and the fat rises to the top.  

After removing the fat, I discard the bones, return the broth to the pot.

Then, I add the veggies and chicken and simmer for about an hour.    I may add some water, depending on how intense the flavor is of the broth.

Finally, I serve the soup, usually with some nice Italian bread and butter.

It takes a little time to make, but it sure is worth it.    I believe this to be far superior to any soup you can buy in the store.   If caning, I reserve the carrots for the jars.   They will cook in the jars, while pressure canning for an hour and a half...   They may get too mushy if you cook them in the soup for an hour and then pressure can them for an hour and a half...    Please refer to a good book on caning, so that you follow safe preserving practices.

I hope you enjoy this recipe and method on how to make your own homemade chicken soup, made without MSG.   That is something you can feel really good about, being able to serve your family soup you made yourself in a wholesome way that has no MSG.    

Homemade Cranberry Sauce - The World's Best Cranberry Sauce Recipe

Hello, Sicilian Prince here - 

I just needed to share this homemade cranberry sauce recipe, as it is one of the greatest I have ever tasted.  A few years ago, my wife and I were watching Ozzy Osbourne's reality show, and he had a Holiday special.   I don't remember who, but someone was making fresh cranberry sauce from scratch, and it looked really easy to do.   We love cranberry sauce, so we said that we just had to try to do that someday.

Fast forward a year or two, we are shopping in Whole Foods and see fresh organic cranberries on sale, and we looked at each other and said now we don't have an excuse not to try it.  But, we needed a recipe...  Where to get one...   So, we looked and looked..  Now, commercial cranberry sauce, most of them anyway, has high fructose corn syrup...  Something we actively try to ignore.   We decided to make ours with Organic Sugar.

 In asking round, we came across a recipe from someone's German Grandmother.   It looked good and sort of a starting place.   It also looked similar to what we saw on that Ozzy show.   But, we wanted this to be spectacular...

Shopping at Trader Joes, we found these:

Trader Joe's Orange Cranberries

Immediately, we knew that these would be awesome in the recipe.   So, we tried it.   Wow!   Totally blown away.  If you can get your hands on these, get them.

Technically, this easy cranberry sauce recipe is a cranberry relish, or cranberry conserve.   I really don't care about the technicalities.   What matters to me is this is one of our healthy easy recipes.   The ingredients are so good and wholesome.   Look up the health benefits of cranberries, you will see what I am talking about.

This Cranberry Orange Relish is one of the best recipes I have... If you don't try any other recipe, do try this one...

Here is my YouTube video for this Cranberry Sauce Recipe ( Note, I am more than quadrupling it... It is THAT GOOD!)


Ingredients
  • 4 Cups Cranberries
  • 1 tbsp Orange Zest
  • 2 Oranges, peeled, pitted and quartered.
  • 1 Cup Dried Orange Cranberries (Trader Joes) or Rasins
  • 1 1/4 Cup Water
  • 1 Cup Pecans
  • 2 1/2 Cup Sugar

Directions

 In a pot put in everything but the sugar and pecans.    Stir occasionally while simmering on medium low heat ( Probably 15 to 20 minutes.) Do this until the cranberries are soft that the pot  is bubbling.

After the cranberries are soft, the pecans and stir them in well.

Next, add all of the sugar at one time!   Stir it in well and let the whole mixture melt, bubble and thicken.   About 10 or 15 minutes more.   Taste it and see if you want to add a little more sugar.   Depends on the tartness of the cranberries you are using.

If you are canning, do your canning now.   If not, transfer to a container and allow to cool before serving.   I like cranberry sauce cold, so I would refrigerate it before serving.

That was easy, wasn't it.    Now, I am not responsible for your addiction to this easy cranberry sauce or tears when there is no more left.   Although this is not an Italian recipe, I feel it is too good not to share with you.   As you can see in my video, I ended up with 25 Jelly Jars and 2 Pint jars....That is a lot of cranberry sauce!   I truly hope you try out this cranberry relish recipe.   

From my family to yours, I wish you a happy and healthy Thanksgiving.   

- Sicilian Prince

Friday, October 18, 2013

Chicken Piccata Recipe - Lemon Chicken Recipe

I seem to really enjoy lemon this time of year.   This Italian chicken recipe, My Chicken Piccata Recipe, tastes very gourmet, yet is very easy to make.  I also have previously posted a recipe for Chicken Francese, another recipe that has lemon.   This Chicken Piccata Recipe is a little easier to make, but also very delicious.  That makes both of these Lemon Chicken recipes among my very most favorite Italian chicken recipes.

Chicken Piccata
Chicken Piccata - Doesn't This Look Great!


Ingredients

  • 1 lb Thin Sliced Chicken Cutlets
  • Sea Salt
  • 1 Cup Flour
  • 1/2 Stick of butter
  • 1/2 Cup premium quality extra-virgin olive oil, I use Colivita
  • 4 Lemons
  • 1 cup Chicken Broth
  • 1/4 cup rinsed and drained Capers
  • 1 Can of Artichoke Hearts, rinsed and drained
  • 1/4 cup fresh parsley, chopped
Directions

Squeeze 3 of the lemons and set the juice aside.   Take the 4th lemon and cut into thin slices for garnish.
          
Reserve 2 Tbl of flour and set aside.


Put the remaining flour on a plate. Grind some fresh Sea Salt on the Flour and mix. 


Dredge the chicken cutlets in flour.


In a large skillet, melt some butter and add some olive oil. 


Fry the chicken in the butter and olive oil mixture, cooking both sides until browned. Cook all of your chicken this way.


Remove the chicken from the skillet and set aside. Do NOT clean the pan

.
Add the flour to the chicken broth and mix it well, while the broth is cold.


Add the chicken broth (with the flour), lemon juice and capers to the skillet. Bring this gravy to gentle boil. Make sure you incorporate what was left in the skillet by scraping with your spatchula or spoon, for added flavor. Simmer for 5 minutes. 


Add the chicken and the artichoke hearts to the gravy in the pan and simmer for an additional 5 to 10 minutes minutes. 


Plate the chicken piccata and ladle some of the gravy with capers and artichoke hearts over the chicken piccata. 


Garnish the Chicken Piccata with the lemon slices and parsley.   Serve with a side of pene.

I hope you enjoy this awesome and easy to make Italian chicken recipe. Chicken Piccata just tastes amazing, and it very easy to make.   On a cold winter day, perhaps if you don't feel well, Chicken Piccata seems to make you feel better, like Grandma's Chicken Soup.   An easy variation for this Chicken Piccata Recipe is to omit the capers, since not everyone likes them.

Monday, October 14, 2013

Holiday Shopping for the New Wine Maker

Do you have a special person who would love to learn how to make wine at home?  Do they stare at their Wine Spectator magazine with visions of Chianti dancing in their head? With the holiday season quickly approaching, I thought it may be helpful for folks, who are interested in giving the gift of home wine making but don’t know where to start, some guidance.

First, while so many people would love to receive a gift like the ability to learn how to make homemade wine, it pays to do a little homework! You wouldn’t want to give the ability to make Alcohol to a person with dependency challenges.
All I Want For Christmas Is My Two Wine Kits


Wine making doesn’t have to be hard. While many are intimidated by the idea of stomping on grapes or growing / picking / buying fresh fruit, these days, there are other options that are much easier for the beginner. Wine Kits are a great option for someone just starting out, and many make excellent wines.   

Most of the things I will recommend here are available from your local Home brew shop. But, many don’t have a local home brew shop, so I am putting in links here where everything comes from Amazon.com. Amazon has a great selection, and often time has free shipping, which is a huge plus. If you are getting these things as gifts, you can even have Amazon ship the gift directly to the person you are giving it to, saving you time, money and lines at the post office…

There are lots and lots of options, so I would suggest doing a little snooping to find out a few things like:

     Does the person like Reds or Whites?

        What kinds? Do they like a Cab or Pinot Noir? Chardonnay or Riesling?

    Do they like Dry, Slightly off Dry, or Sweet Wines?

 After you do a little research, you next need to know this very important fact:

Wine Kits are like Cake Mixes! A Wine Kit is a Wine Ingredient Kit! Wine Kits don’t come with the equipment to make the wine (most of the time). Let us compare this to a box of Brownie Mix. The Brownie Mix doesn’t come with pans, mixers, spoons, bowls or the oven, right?

Most Wine Kits come with:

  •     A Bag of Grape Juice Concentrate
  •     Yeast
  •     Packet of K-Meta ( to stop fermentation )
  •     Packet of Bentonite
  •     Packets for clearing (Most use Chitosan, a shell fish derivative )
And some come these things in addition:
  •     Oak Chips – Oak Sawdust or both
  •     Sorbate ( Used to prevent fermentation if back-sweetening wine )
  •     Corks and Caps ( Only included in PakLab Kits, such as Vino Italiano )

That is it! You will most likely need to add water (unless you are doing a port). There is no equipment included here, except for the one thing I will recommend that comes with everything. More on that later….

Now you will need to add the wine making equipment to the equation. You don’t need a lot of equipment to make wine, but a few things are essential. The equipment is a buy once and use over and over investment.

For equipment, this is a basic starter kit:

 
But, I would recommend adding these things:


If you want a better equipment kit, I would recommend this:


Now that you have wine making equipment out of the way, you can look at the wine kits. Based off of your research, I would recommend getting the person the type of wine they like. If they like big red wines, get them a Cabernet Sauvignon, or Merlot. If Pinot Noir is their thing, go for it…. If they like white wines, go with their preference.

For starters, I would recommend these wine kits:

Lower Priced:


Medium Priced:


Premium Priced: 


This is something entirely new. Amazon now has a wine kit AND equipment kit all in one package! The kit comes with the basic equipment you need AND two wine kits!
 
 
This comes with a Cabernet Sauvignon and a Chardonnay wine kit, each producing about 25 bottles of wine. For the price, it is very attractive. This it includes a food grade Plastic carboy, similar to the Better Bottle style carboy. While many folks prefer this style carboy, I still prefer the glass carboys. Sure Glass can break and is heavy, but I am old school that way. If you want Glass, then I would pass on this. Otherwise, it is an awesome deal.

What is nice about it is that it comes with everything but the bottles… It makes for a more complete gift. I would still order extra cleanser, K-Meta and Oak. And if you are following along with my videos, I would make these to 5 gallons each, instead of 6. Just like the Vino Italiano.

So, I hope this article was helpful for you to put a smile on a new winemaker’s face, when they find these things under the tree this year.

Thursday, September 26, 2013

Struffoli Recipe - Italian Honey Balls

Struffoli Recipe
Italian Masterpiece


Making Italian dessert recipes are some of the things that build memories, especially if you involve your children in the process. Struffoli is one of those things that is very popular among Italian families around the Christmas holiday season. In fact, while I was growing up, I don’t remember a Christmas without it.  This Struffoli Recipe is easy to make, tasty and colorful. 


Italian Honey Balls, called Struffoli

Once you make this Struffoli Recipe, the Struffoli will keep covered at room temperature for several days. Therefore it is an easy to make this Struffoli recipe the day before company comes over for family get togethers..

Honey also has numerous healthful qualities, so you need not feel guilty about this recipe. I prefer to use Grapeseed Oil. I like the way it works with this, but if I can’t get it, I use Safflower oil. I tend to try to steer away from Canola and Corn Oils… Not because they taste bad, but because I opt for a healthier alternative.

Let's get started with this Italian dessert, my Struffoli Recipe!


Ingredients For The Struffoli Recipe
  • 1 ½ cups of flour
  • ¼ tsp salt
  • 3 eggs
  • 1 ½ cups honey
  • Candied fruit and citrus peel
  • Multi-colored Nonpareils
  • Sliced Almonds
  • You will also need vegetable oil for Deep Frying

Directions For The Struffoli Recipe

  • Combine the flour and salt in a large bowl and set aside.
  • I use a Kitchen Aid Mixer for this with a dough hook. Beat the eggs with your mixer and add the flour/salt mixture while pulsing the mixer. Then, mix until a well blended dough forms.
  • Mix (knead) in you mixer a few minutes, until the dough is smooth. If the dough is sticky, add a little more flour.
  • Shape the dough into a ball and place it back into your mixing bowl. Cover with plastic wrap and let it sit for about a half hour.
  • Divide the dough into 8 pieces. Roll one piece into a ½ inch diameter rope, using your hands.
  • Cut the rope into ½ inch sections
  • Heat up your oil in a fryer, (use a fry baby if you have one). Once heated up, fry up enough at a time as not to over crowd them while frying. It should take about 2 minutes to fry to a golden brown.
  • After all of the Struffoli are fried, set them aside and heat up the honey in a sauce pan until it starts to simmer.
  • Remove the honey from the heat and add the Struffoli to the pan and gently stir well to coat all of the Struffoli with the hot honey.
  • On your serving plate, pile up the Struffoli into a Struffoli mountain and decorate it with the nonpareils sliced almonds and candied fruit.

I hope you enjoyed making my Struffoli Recipe. This is a classic Italian dessert recipe that is loved by all ages. Check back for more authentic Italian recipes.  Happy Holidays!

Monday, September 23, 2013

Winexpert Chocolate Raspberry Port Wine Kit - A Yummy Experience

Winexpert Chocolate Raspberry Port Kit A Very Cool and Delicious Wine kit. 

UPDATE: Please check my new wine making website for more detail on wine making.   How To Make Homemade Wine

Winexpert is the leading manufacturer of Wine kits for folks, like me, who love to make their own wine. I made this kit last year, and was blown away by it's all around excellence. It was so good, I decided to make two this year...


This kit makes 30 of the small size port bottles, the 375ml.  The 750ml bottle is the standard size, so if you wanted to bottle in the standard bottles, you will only get 15 out of this kit.

Since this kit makes 3 gallons, I decided to make two of them, so that I can easily work with a 6 gallon carboy.   If  you don't have a 3 gallon carboy and want to make this kit, you may want to get a 3 gallon carboy if you plan on making only one.

So, follow along with me while I make it. Here is the video I made of the first part, called Primary Fermentation...


In the next step in making this wine kit, sugar is added to bump up the ABV.

After that, we are up what wine makers call Secondary Fermentation.

Wednesday, September 18, 2013

DIY Herbal Remedies

Herbal Remedies have been used ever since there have been people on the planet.   I have been a student of herbs for about a decade.   I have decided to share some of what I learned with a few videos I posted on YouTube.  

Before I continue, I want to post a small disclaimer:

With that out of the way, I thought it would be nice to post some links to they YouTube videos I have made.   I hope you enjoy these and that they help you and your loved ones.


I am a student of HerbMentor.com.   Check out that site if you want to learn in an online format...  It works on a subscription basis.   I am not affiliated with them, other than being a member, but I get a lot out of their site and wanted to share the love..   

I know this isn't an Italian Recipe, but since I am Italian and I am making it, perhaps it could be!    Anyhow, enjoy.

Friday, September 6, 2013

Diamanti Milk Chocolate Strawberry Port Wine Kit - Finishing the Kit


UPDATE: Please check my new wine making website for more detail on wine making.   How To Make Homemade Wine
I have to say that this wine kit came out excellent.   I am really enjoying this kit and I am loving Amazon for offering it...

The sad thing about this kit is that the directions are very very very poor.   So, if you get this kit, please refer to my directions, as I made it in the videos I posted on YouTube.

All in all, I think this wine kit is supposed to compete with the Winexpert Chocolate Raspberry Port.  The C. R. P. is a gold medal winning wine kit.    The Diamanti Milk Chocolate Strawberry Port, while not made by Winexpert, is a very nice alternative, at a very reasonable price.

The Winexpert kit comes with an extra sugar pack that you add half way thru the fermentation process, to boost the alcohol content to about 18% when the wine is finished.   Ports usually have a higher alcohol content, by nature.    The Diamanti kit, on the other hand, does not add a sugar pack for this purpose, so the finished wine would be around 14.5%.   I was toying with the idea of adding a simple syrup to the wine half-way thru, but opted to just add a cup and a half of brandy to kick up the alcohol content.  The results are excellent.

To describe the taste, it is not overly sweet, but tastes like a Strawberry that has been dipped in a high quality gourmet chocolate.   Very nice as an after dinner dessert wine.

I ended up with 25 half sized bottles, and an extra quart of wine, not to mention the wine I drank while in the, ehhh, Research and Development, yeah that's it, part of the wine making process.

The kit can be found here:


The video series is here:


All in all, this is a very delicious kit, and I would highly recommend it.   Please let me know how you make out, if you decide to make this one!


Thursday, September 5, 2013

Making Black Raspberry Wine from Homegrown Organic Raspberries


Hello Everyone!

I have been doing a lot of gardening and wine making this summer.  

One of this years projects is to make wine from the Black Jewel Raspberries that I have been growing in my back yard.   If you have been checking out my YouTube channel, I am sure you have been seeing them.   

So, after reading the description in a book I have on wine making, I decided to make the Raspberry wine , since the author said that it was his favorite wine, bar none.

This is the book I am referring to:


The recipe in the book was for one gallon, I just tripled the recipe, since I was intending to make 3 gallons of wine.   I just finished racking and I ended up with 4 gallons...

Here are the videos:


So, at this point in time, this is where I am up to in the process of making this wine.   Stay tuned to see how this progresses!

Monday, August 12, 2013

Zucchini Pie - Delicious Italian Squash Recipe


This Italian Summer Squash, Zucchini, is very abundant this time of year.   This is a great way to enjoy this Squash in a pie, which is sort of like a quiche, only better.   In fact, I don’t really like quiche, but I like this pie.
Zucchini Pie
Zucchini Pie


You can check out my YouTube video on how to make this recipe.


Ingredients

·         3 cups of cubed Zucchini
·         2 cloves chopped garlic
·         1 medium onion, diced
·         ½ cup shredded Parmesan cheese
·         ½ cup of shredded Cheddar or Mexican Blend Cheese
·         4 eggs, beaten
·         1/3 cup Olive Oil
·         1 cup of Bisquick
·         Salt to taste
  
    Directions

  • Combine the ingredients above in a large bowl, starting with the eggs.   Add the garlic and onion, then the cheese.    Next, add the olive oil, Bisquick, zucchini and salt. 
  • Add the mixture to a greased pie plate  
  • Bake at 350 Degrees for about 40 minutes.
  • Enjoy

It doesn’t get much more simple that this.   Isn’t it great when simple tastes good?   I think so.

I hope you have enjoyed this awesome recipe and give this dish a try!